・仮想化環境を構築するために、Windows 11にVMware Workstation Proをインストールした。
・VMware Workstation Proで仮想マシンを作成して、Ubuntuをインストールした。
・UbuntuにWordPressをインストールしたい。
・データーベースはMySQL、WebサーバーはApacheを選択した。
・WordPressのテスト環境を作成したいだけなので、とりあえずインストールするだけの手順。細かいことは後で(困った都度)調べることにする。
設定したい部分
・WordPressをインストールしたい。
管理者権限を設定してログイン
①rootのパスワードを設定します。
sudo passwd root[sudo] ■■■のパスワード:(ユーザーパスワードを入力)
新しいパスワード:(root(管理者)パスワードを入力)
新しいパスワードを再入力してください:(root(管理者)パスワードを再入力)
passwd: パスワードは正しく更新されました
「パスワードは正しく更新されました」と表示されたことを確認します。
②管理者権限にスイッチします。
su -パスワード:(root(管理者)パスワードを入力)
root@■■■:~#
rootユーザーになっていて、プロンプトが#になったことを確認します。
Ubuntuのパッケージを最新版にする
①Ubuntuのバージョンを確認します。
※パッケージの最新版とは関係ないが、コマンドを調べたのでとりあえず確認してみた。
lsb_release -aNo LSB modules are available.
Distributor ID: Ubuntu
Description: Ubuntu 22.04.5 LTS
Release: 22.04
Codename: jammy
②パッケージのリストを最新にします。
sudo apt update17.6 MB を 5秒 で取得しました (3,854 kB/s)
パッケージリストを読み込んでいます… 完了
依存関係ツリーを作成しています… 完了
状態情報を読み取っています… 完了
アップグレードできるパッケージが 634 個あります。表示するには ‘apt list –upgradable’ を実行してください。
「アップグレードできるパッケージが ●個あります。」と表示されたら、アップグレードします。
③ソフトウェアパッケージをアップグレードします。
sudo apt upgrade -yApacheのインストール
①Apacheをインストールします。
sudo apt install apache2 -y②Apacheのバージョンを確認します。
apachectl -vServer version: Apache/2.4.52 (Ubuntu)
Server built: 2025-04-03T09:05:48
PHPのインストール
①PHPをインストールします。
sudo apt install php libapache2-mod-php php-mysql -y| コマンド(オプション) | 説明 |
|---|---|
| php | PHP本体 |
| libapache2-mod-php | ApacheにPHPを組み込むためのモジュール |
| php-mysql | PHPからMySQLに接続できるようにする拡張モジュール |
②PHPのバージョンを確認します。
php -vPHP 8.1.2-1ubuntu2.21 (cli) (built: Mar 24 2025 19:04:23) (NTS)
Copyright (c) The PHP Group
Zend Engine v4.1.2, Copyright (c) Zend Technologies
with Zend OPcache v8.1.2-1ubuntu2.21, Copyright (c), by Zend Technologies
MySQLのインストール
①MySQLをインストールします。
sudo apt install mysql-server -yMySQLサーバーの初期セキュリティ設定
①MySQLサーバーの初期セキュリティ設定をします。
※質問に対してリプライで応答します。
sudo mysql_secure_installationSecuring the MySQL server deployment.
Connecting to MySQL using a blank password.
VALIDATE PASSWORD COMPONENT can be used to test passwords
and improve security. It checks the strength of password
and allows the users to set only those passwords which are
secure enough. Would you like to setup VALIDATE PASSWORD component?
[パスワードの強度を設定しますか?]
Press y|Y for Yes, any other key for No: y
There are three levels of password validation policy:
LOW Length >= 8
MEDIUM Length >= 8, numeric, mixed case, and special characters
STRONG Length >= 8, numeric, mixed case, special characters and dictionary file
[パスワードポリシーの強度をどれに設定しますか?]
Please enter 0 = LOW, 1 = MEDIUM and 2 = STRONG: 0
Skipping password set for root as authentication with auth_socket is used by default.
If you would like to use password authentication instead, this can be done with the “ALTER_USER” command.
See https://dev.mysql.com/doc/refman/8.0/en/alter-user.html#alter-user-password-management for more information.
By default, a MySQL installation has an anonymous user,
allowing anyone to log into MySQL without having to have
a user account created for them. This is intended only for
testing, and to make the installation go a bit smoother.
You should remove them before moving into a production
environment.
[匿名ユーザーを削除しますか?]
Remove anonymous users? (Press y|Y for Yes, any other key for No) : y
Success.
Normally, root should only be allowed to connect from
‘localhost’. This ensures that someone cannot guess at
the root password from the network.
[rootはローカルホストからのみ接続しますか?]
Disallow root login remotely? (Press y|Y for Yes, any other key for No) : y
Success.
By default, MySQL comes with a database named ‘test’ that
anyone can access. This is also intended only for testing,
and should be removed before moving into a production
environment.
[テスト用のデーターベースを消してもいいですか?]
Remove test database and access to it? (Press y|Y for Yes, any other key for No) : y
Dropping test database…
Success.
Removing privileges on test database…
Success.
Reloading the privilege tables will ensure that all changes
made so far will take effect immediately.
[権限テーブルをリロードして変更を有効にしてもいいですか?]
Reload privilege tables now? (Press y|Y for Yes, any other key for No) : y
Success.
All done!
WordPressのデータベースとユーザーの作成
①MySQLサーバーにrootでログインします。
sudo mysql -u root -pEnter password:(パスワード)
Welcome to the MySQL monitor. Commands end with ; or \g.
Your MySQL connection id is 10
Server version: 8.0.42-0ubuntu0.22.04.2 (Ubuntu)
Copyright (c) 2000, 2025, Oracle and/or its affiliates.
Oracle is a registered trademark of Oracle Corporation and/or its
affiliates. Other names may be trademarks of their respective
owners.
Type ‘help;’ or ‘\h’ for help. Type ‘\c’ to clear the current input statement.
mysql>
[プロンプトがmysql>になったことを確認します]
②データベースを作成します。
CREATE DATABASE wordpress;[データーベースの名は任意に付ける]
mysql> CREATE DATABASE (データーベース名);
Query OK, 1 row affected (0.01 sec)
②ユーザーを作成して、パスワードを設定します。
CREATE USER 'wordpress_testuser'@'localhost' IDENTIFIED BY 'wordpress_testpw';[ユーザー名とパスワードは任意に付ける]
mysql> CREATE USER ‘(ユーザー名)‘@’localhost’ IDENTIFIED BY ‘(パスワード)‘;
Query OK, 0 rows affected (0.01 sec)
③データベースをデータベースを作成します。
GRANT ALL PRIVILEGES ON wordpress.* TO 'wordpress_testuser'@'localhost';[データーベース名とユーザー名は前手順で設定したものを指定する]
GRANT ALL PRIVILEGES ON (データーベース名).* TO ‘(ユーザー名)‘@’localhost’;
Query OK, 0 rows affected (0.00 sec)
④変更を反映させます。
FLUSH PRIVILEGES;⑤MySQLから抜けます。
EXIT;WordPressのダウンロードと設定
①tmpディレクトリに移動します。
cd /tmp②WordPressの最新版を取得します。
wget https://wordpress.org/latest.tar.gz③tarファイルを解凍・展開します。
tar -xvzf latest.tar.gz④展開したファイルを移動します。
sudo mv wordpress /var/www/html/wordpress⑤所有者を変更します。
sudo chown -R www-data:www-data /var/www/html/wordpress⑥権限を変更します。
sudo chmod -R 755 /var/www/html/wordpress⑦wordpressディレクトリに移動します。
cd /var/www/html/wordpress⑧サンプルファイルをコピーして、新しい設定ファイルを作成します。
cp wp-config-sample.php wp-config.php⑨コピーしたファイルを開きます。
nano wp-config.php⑩赤字の部分を修正します。
define('DB_NAME', 'wordpress');
define('DB_USER', 'wordpress_testuser');
define('DB_PASSWORD', 'wordpress_testpw');
define('DB_HOST', 'localhost');[赤字の部分を書き換える]
define(‘DB_NAME’, ‘(データーベース名)‘);
define(‘DB_USER’, ‘(ユーザー名)‘);
define(‘DB_PASSWORD’, ‘(パスワード)‘);
define(‘DB_HOST’, ‘localhost’);
設定を変更したら「Ctrl」+「S」(保存)、「Ctrl」+「X」(終了)でnanoから抜ける。
Apacheの設定
①ディレクトリを移動します。
cd /etc/apache2/sites-available/②Apache設定ファイルを作成します。
sudo nano wordpress.conf③以下の内容をコピーします。
<VirtualHost *:80>
  ServerAdmin webmaster@localhost
  DocumentRoot /var/www/html/wordpress
  ErrorLog ${APACHE_LOG_DIR}/error.log
  CustomLog ${APACHE_LOG_DIR}/access.log combined

  <Directory /var/www/html/wordpress/>
    Options Indexes FollowSymLinks
    AllowOverride All
    Require all granted
  </Directory>
</VirtualHost>設定を変更したら「Ctrl」+「S」(保存)、「Ctrl」+「X」(終了)でnanoから抜ける。
④モジュールを有効化します。
sudo a2enmod rewrite⑤Apache Webサーバーを再起動します。
sudo systemctl restart apache2WordPressの接続確認
①自分のIPアドレスを確認します。
ip a②ブラウザでURLを入力して、WordPressに接続できることを確認します。
http://IPアドレス/wordpress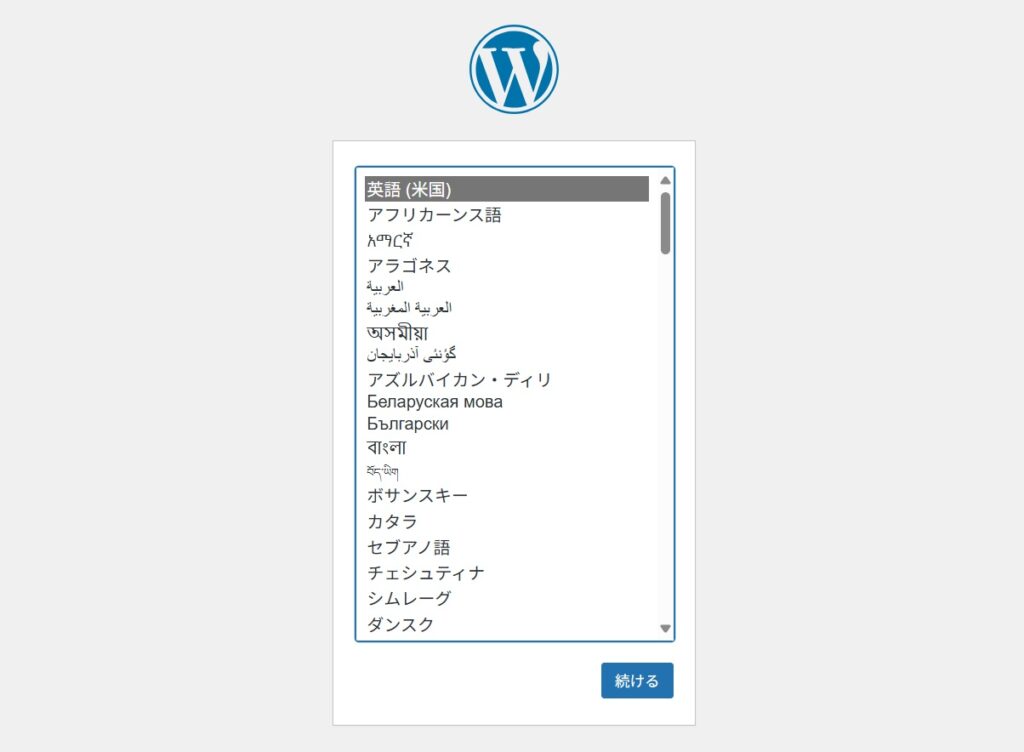
WordPressのインストール
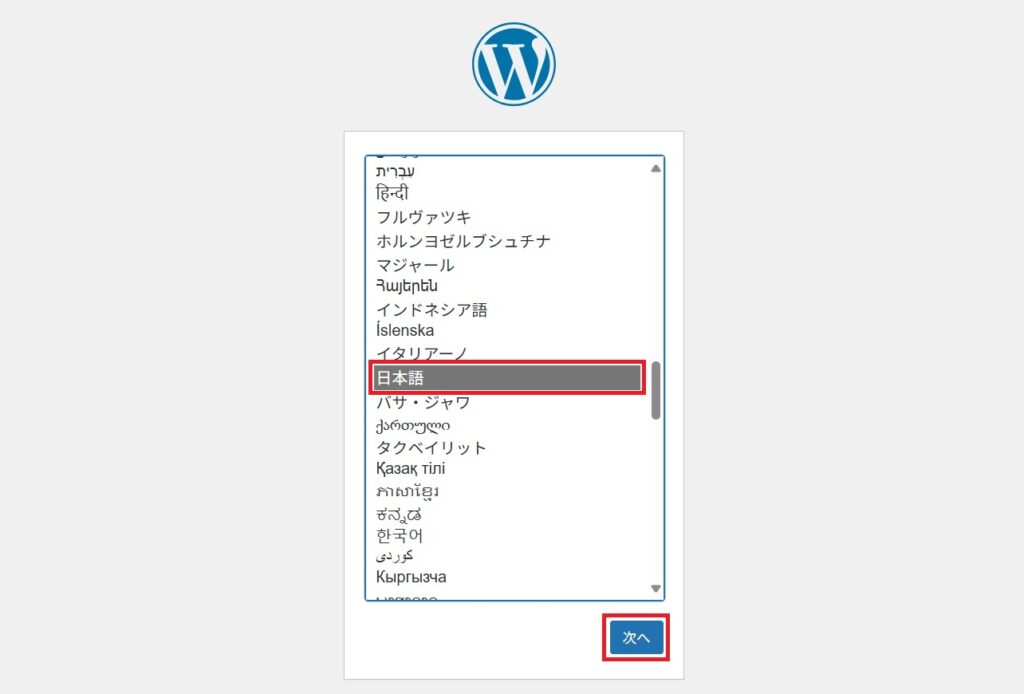
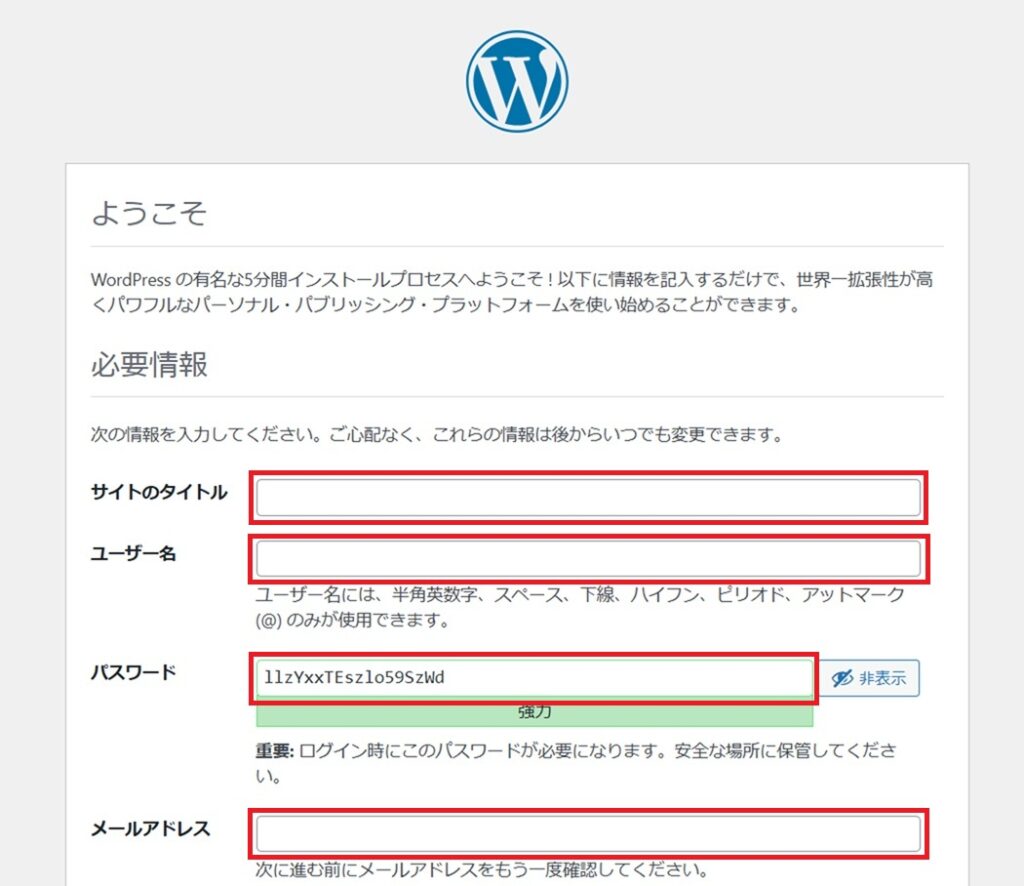
①「日本語」を選択して、「次へ」をクリックします。
②下記を入力して、「WordPressをインストール」をクリックします。
サイトのタイトル:(サイトのタイトル)
ユーザー名:(ユーザー名)
パスワード:(パスワード)
メールアドレス:(メールアドレス)
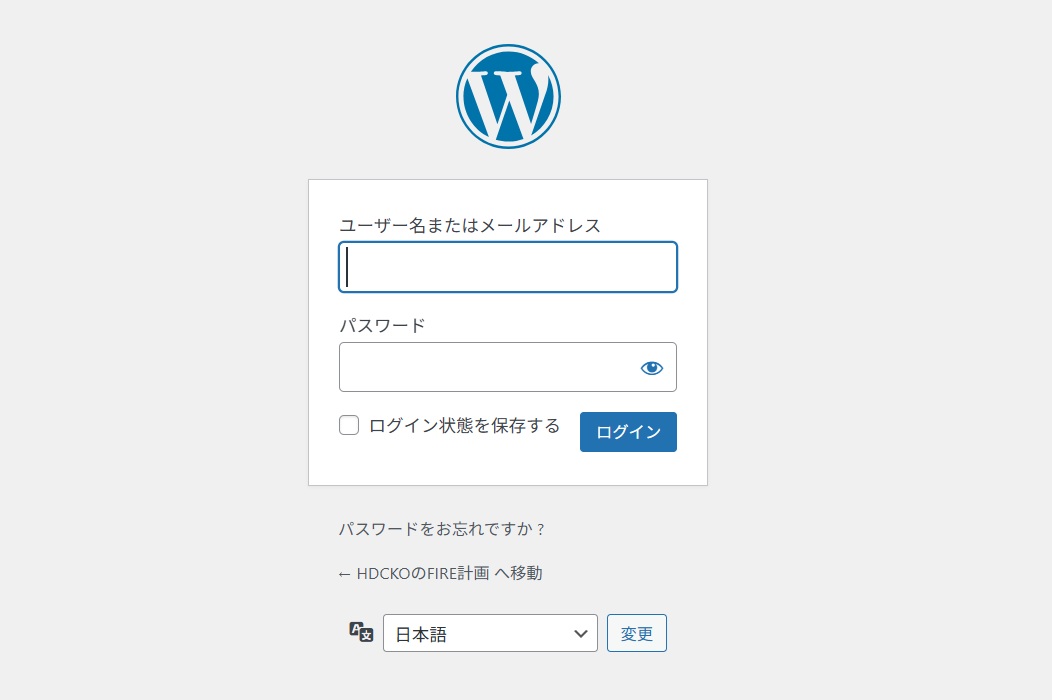
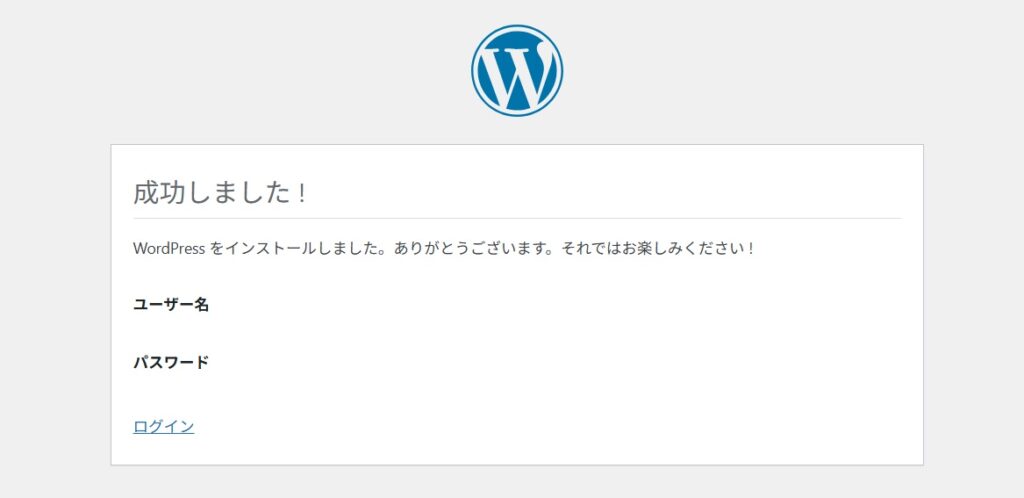
③「成功しました!」が表示されたら、「ログイン」をクリックします。
④「ユーザー名またはメールアドレス」、「パスワード」を入力して、「ログイン」をクリックします。
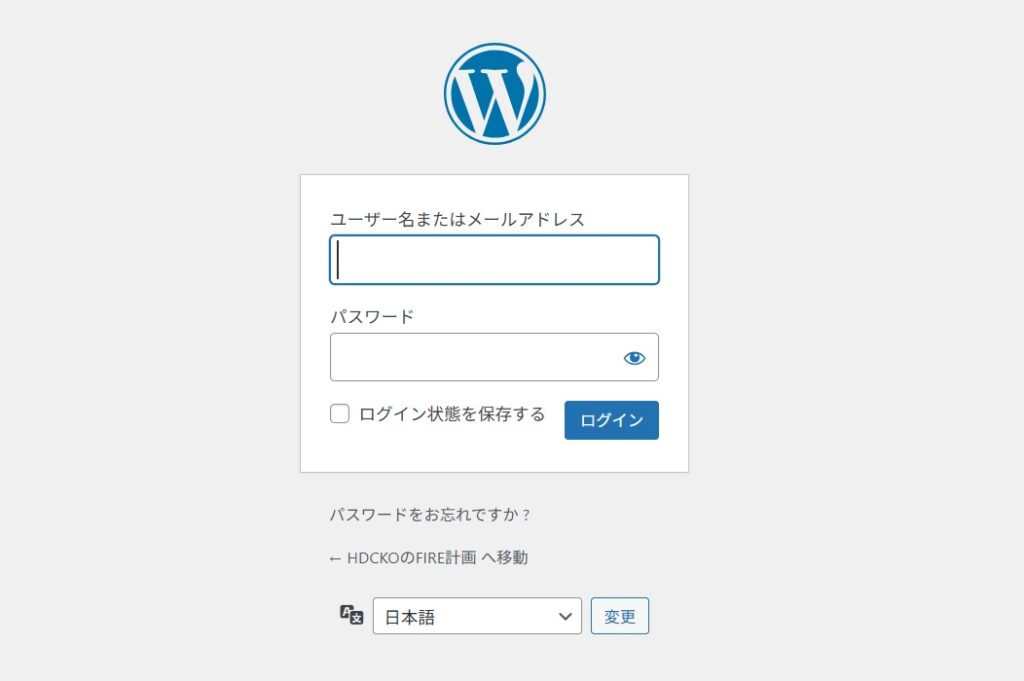
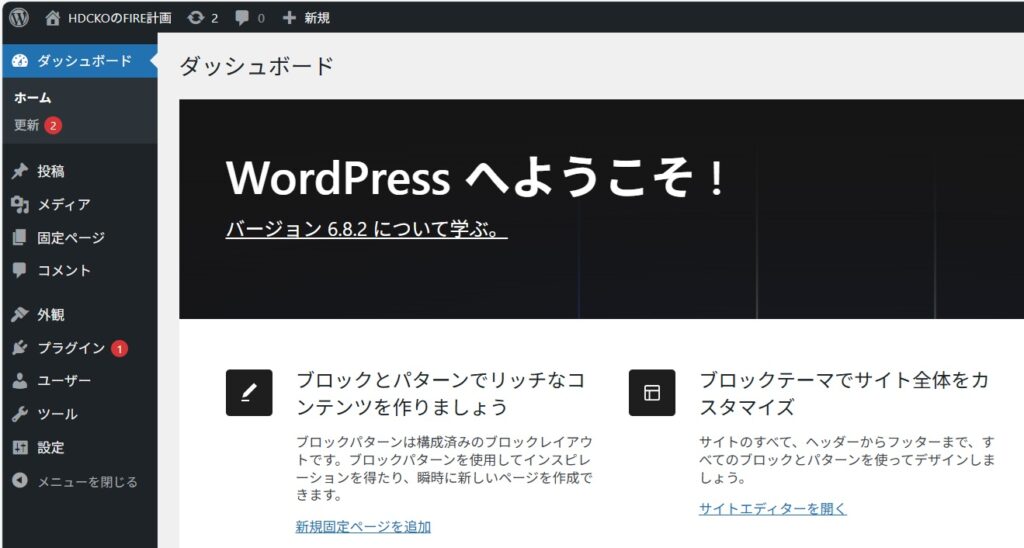
⑤管理画面にログインできたら完了です。